That worked for awhile, but then I got bored with ol' Stretchy. Plus, blogger included a new feature that allows you to upload pictures and post them in different sizes. It couldn't be easier....
small,
medium,
large,
or extra large.
I guess I am an extra large kinda of girl because I love this format. I can see the Fishy crackers in Mandy's teeth from a week ago Sunday. Beautiful.
The problem comes into play because blogger's templates don't support the extra large pictures. How not nice of them.

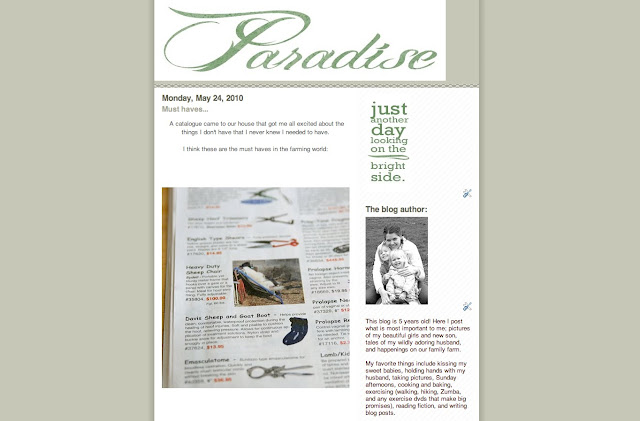
This is a picture of my blog in the Mr. Moto template. My toe-tingling post on Farm Animal Accessory Must-Haves is showing, but the extra large pictures are cut nearly in half.
So, this is what you do. You can easily host these big pictures, but you need to increase the "wrapper" size.
Go to "edit html." Do not be afraid. If you mess anything up, just choose another template and start over. You don't lose your links or any other sidebar information.
In the HTML mode, look for "header wrapper" and "outer wrapper." They are set to about 720px. Increase that number to 950px. Then, find "main wrapper" and "sidebar wrapper." Change those numbers to equal 950. I have my main wrapper as 670 and my sidebar wrapper as 250. You'll also need to allow space in the "padding" otherwise your sidebar writing will run smack-dab into your blog post. All the numbers together should equal 950px.
Play around with those numbers in HTML and click preview after each change. It will easily show you how badly you've messed with your blog.
Click save changes when you have things looking good.
This is a really good tutorial where I learned how to change my own blog.
I wanted to put a pretty background picture up. This is a very informative "how to" for installing pictures/paper in the background. It gives your blog a very unique look and is easy to do.
Doesn't look quite right?
I uploaded a digital scrapbook paper from my computer to Photobucket. Follow the tutorial I linked above it is really easy, just make sure you use the direct link not the URL.
This template doesn't have a header across the top, so I went all artsy and decided to just ad a "P" for all things "P" related on this blog. Peters, Paradise, Pee, Poop, Please stop biting my ankles, Pray without ceasing. They are all good. If you want to install a header that doesn't have a specific color background, save your picture (that you created in Photoshop or like program -- use a clear background) as a PNG file. Then upload in blogger as usual using the "layout" setting.
Whew, was that confusing? It's really not so bad once you get the hang of it. Let me know if you give personalizing your blog a try.


Tidak ada komentar:
Posting Komentar